
Last year I rejoined the world of photography when I bought a used Sony Nex5n at a local camera shop. It came with a 18-55mm zoom (SEL1855) and since I had been using a Olympus C-8080 that I had bought – also used – some 9 years before, it was a whole new world. It seemed that it was probably time to give a decent burial to the old camera with its manual lens I still had in a shoe box somewhere, but since two of those were Zeiss as you would I wondered at the value – if any – and hit the search button.
I don’t remember exactly how but down the line I ended up reading an article about using old lens on cameras like the Nex with a special adapter. Three weeks later the needed C/Y to Nex adapter I had ordered came in the mail, but I have to admit that my first relationship with it was not that great. The difficulty in focusing, the extra weight and the fact that the pictures taken with my old lens weren’t all that impressive made me think twice about using them.
Still, I ended up reading through a few articles here and there in hope to gather some insight as to why my pictured sucked and among other things, I learned about the crop factor. Of course that didn’t have anything to do with the poor quality of my shots but it did make me what to get some wider angle lens. Which got me searching yet again, which was when I stumbled on a Rising Pinhole adapter which had been classified as a wide angle (although it was not the wide angle version of this pinhole lens) and was on sale, and was pretty much the only thing I could afford anyway… So I bought it.
And was both seduced and somewhat disappointed with it.
The images just seemed way too blurry.
Still the funny thing is that if you immerse yourself enough into taking a lot of shots and seeing what clicks for you, your eye learns to see beyond the blur. My pictures with this “lens” don’t seem as bad to me now as they did then. But since they first did seem too blurry, I spent time reading through everything I could find on the web about pinholes on digital cameras. And I warn you right away, you are not really going to get that feeling of sharpness that you can get on a large old fashion pinhole cameras, the sensors are too small, the focal distance too short (hope I got that right). But you can have fun…
Nevertheless it seemed to me that there were sharper digital pinhole images to be seen in pinhole forums here and there so I gave the Rising Pinhole cap a closer look and figured the metal part could be unscrewed; which it could. Using a ring piece of cardboard I was able to set it up so the pinhole could be move closer to the sensor. This gave it an even wider angle but did not improve the sharpness; on the contrary. I now think the hole needs to be moved farther away but have not had time to test that precisely. In any case it seemed to me with the info I found on the web that the hole was too big, so I decided to make my own.
After more searching, I retained this information:
“Cut out a piece of aluminum from a can – thin it down with sandpaper – make just the beginning of the smallest hole possible with a pin or needle – rotate the pin to get as much of a circle as possible – sand of the burr from the hole (I use 600 grain sandpaper for this, just barely touching the surface).”
Using a choice of the smallest pin I could find, I gave this a try a couple of times but the results were no better than the Rising Pinhole; the hole was too big.
Fortunately I had an old watch makers magnifier available and looking closely at the pin and needle points revealed that they weren’t really as sharp as all that. So I sharpen one on a stone, tried again, got a better hole – rounder and slightly smaller – but still, the results were just not that satisfying… Although it was the thinnest I had found, the needle was too thick and the hole was still too big.
A few days later I had pretty much given up and was putting the needles back where they belonged when I noticed a small black paper package on the bottom of the needle box. It contained some antique English needles which were very small.
Theses were so thin they bent under the pressure of putting a hole through paper so I sanded down the next piece of aluminum until it felt like anything more sanding would just make a big hole in metal. I then delicately pushed the needle into it so that the point barely went through. Once again I sanded off the burr with 600 grain sandpaper on the side of the aluminum where the needle point came out.
I put the needle tip back in and rotated it smoothly to make as round a hole as possible. It looked pretty good with the magnifying glass and was much smaller than the holes I had made before.
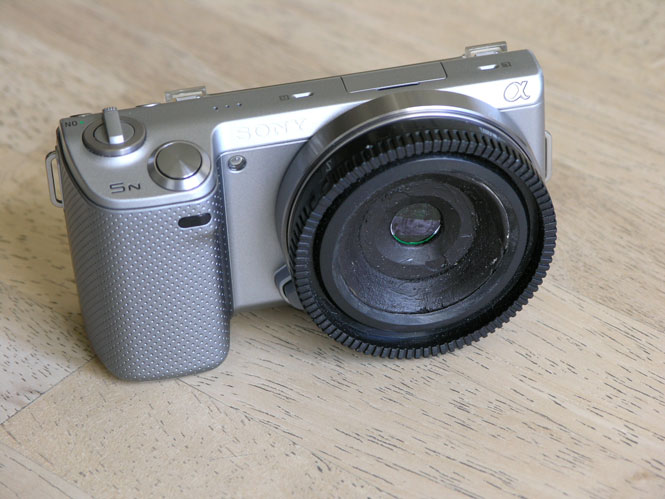
Having bought a couple of nex body caps for this project I cut the biggest possible circle out of one without damaging the part the holds the cap on to the body and then carved a round piece of wood so that it would fit snug in the cap and place the piece of aluminum in the center with black tape.
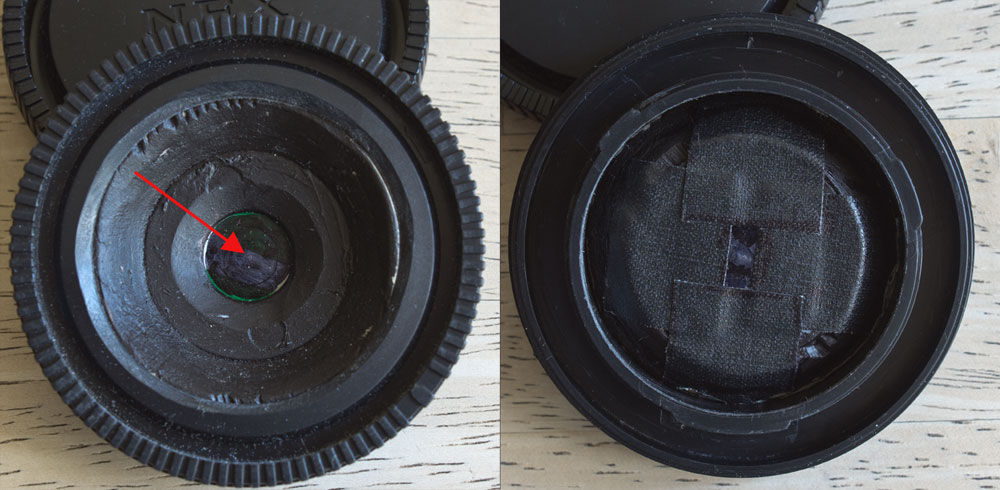
A few tests later revealed that closer to the sensor seemed sharper than near the front of the lens cap so I had to sand down my piece of wood so nothing could touch and damage the Sony lens connection pins. I also removed all the wood between the pinhole and the inner edge of the lens cap that was causing unnecessary vignetting; basically the wood needed to be shaped like a funnel (see picture).
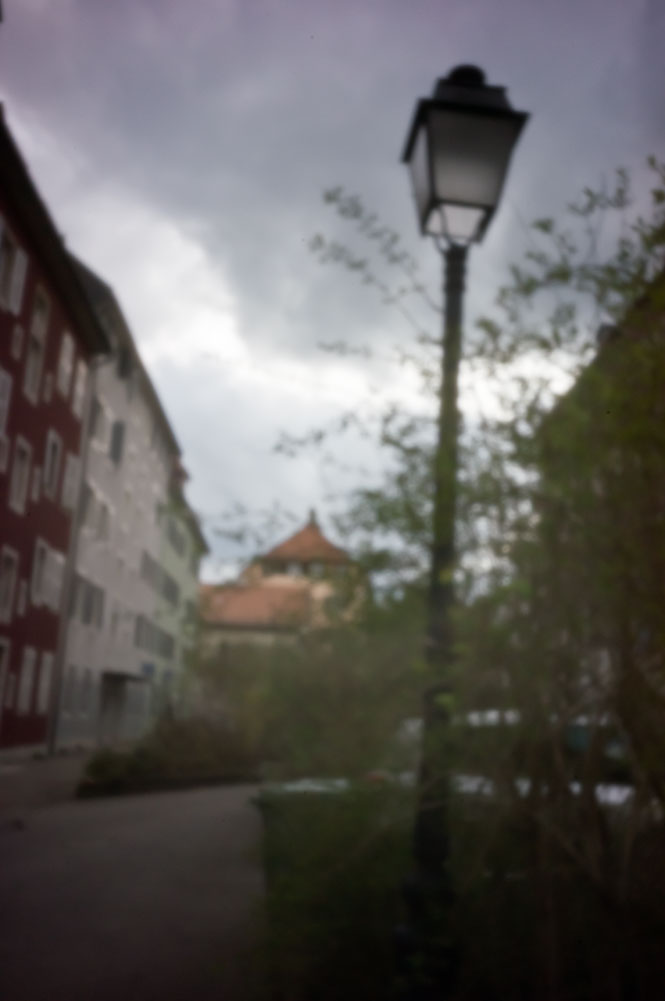
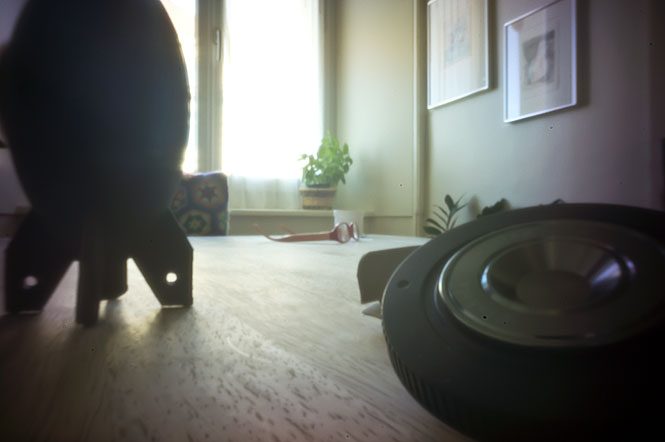
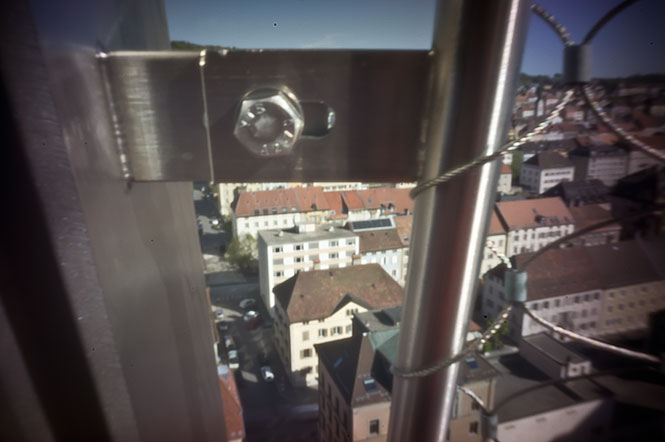
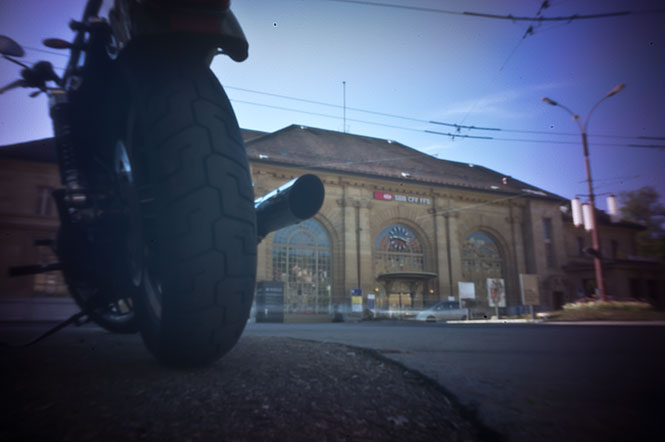
A few weeks ago the sun finally came out so I went around town to take a few shots (update: and will also be adding more recent pictures):
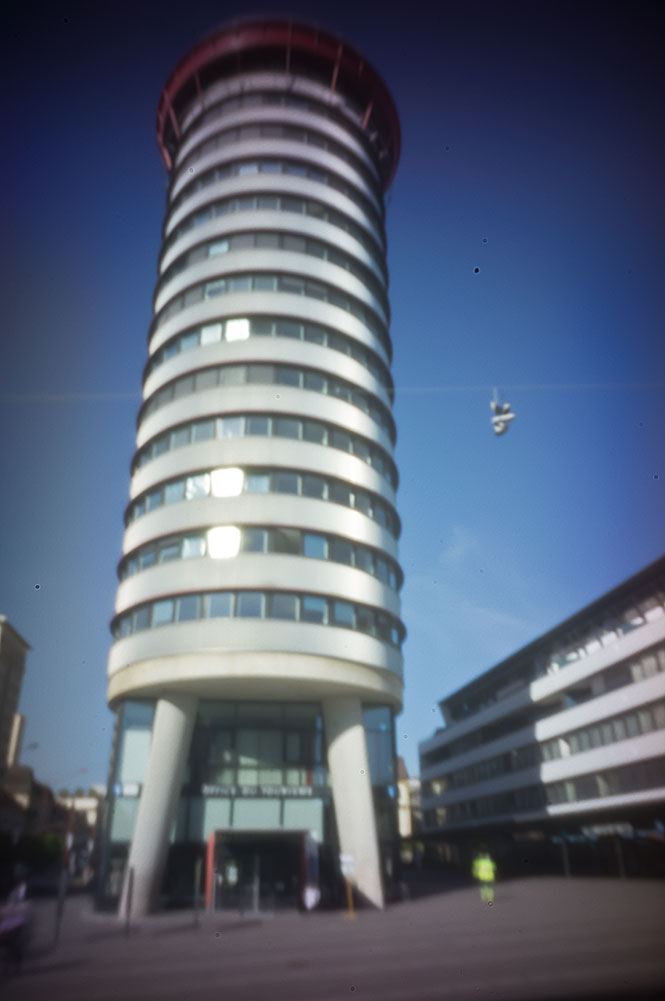
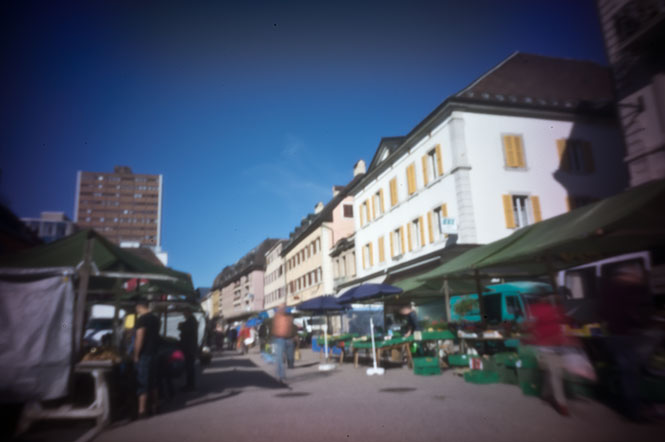


I’m pretty pleased with it even if there is obvious vignetting with a purple hue. The purple seems to be a side effect of the flat angle in which the light hits the nex’s sensor and also happens with the 28mm Industar-69 M39 lens that I have. But not with an old RMC Tokina 17mm C/Y mount wide angle lens I was able to try recently; which put more distance between the lens and the sensor.
At least some of the vignetting comes from the shape of my body cap construction. It would be interesting to be able to place the pinhole without it, maybe try with just tape on the camera body(?).
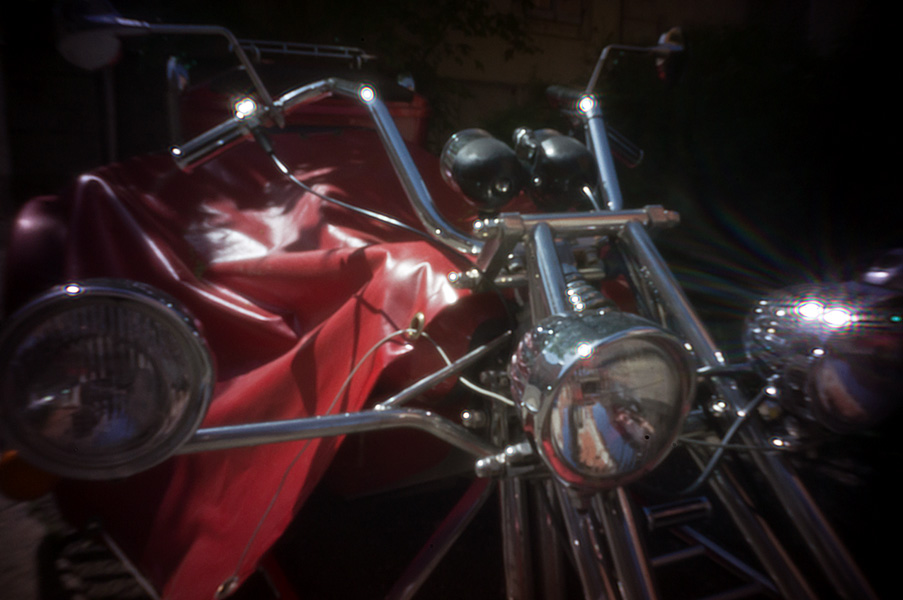
There is also a yellow colored rectangle that appear on the top of all the pictures if you know where to look (middle top of the sky to the right of the parked motorcycle picture, it’s pretty visible). This also seems to be something to do with the sensor, rotating the pinhole does not change it in any way.