
First posted in May 2009 this page was edited and added to so many times that it got pretty confusing. Early September 2010 I reorganized it all, removed what was redundant and hopefully tidied it up enough to be of use.
————————
In November 2008 I acquired a pair of Nautical Style Bones. One thing that became obvious in the weeks after I received them was that I should have bought two pairs to be able to practice with both hands so, curious as to what wood rhythm bones would sound like and interested in the challenge, I decided to make some. Fortunately I had a piece of oak that seemed the perfect size so I clamped it down and cut out two curved chunks with a saber saw.
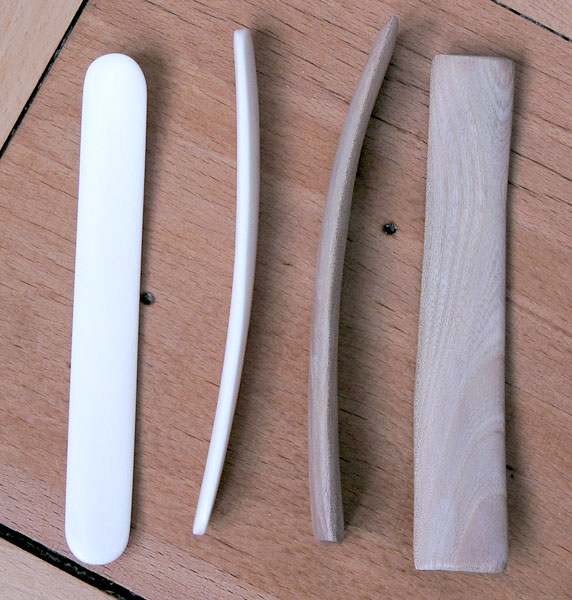
 Not having figured out the best tools to turn those thick pieces of wood into smooth rib bone shaped curves, I spent a couple of days using wood files, chisels and sandpaper to carve and sand them both down to a shape that seemed OK. (1.25 inches (3cm) wide – and 7.25 inches (18.5 cm.) long). In any case picture #2 shows how they came out as well as the pair of Nautical Style Bones that I first bought.
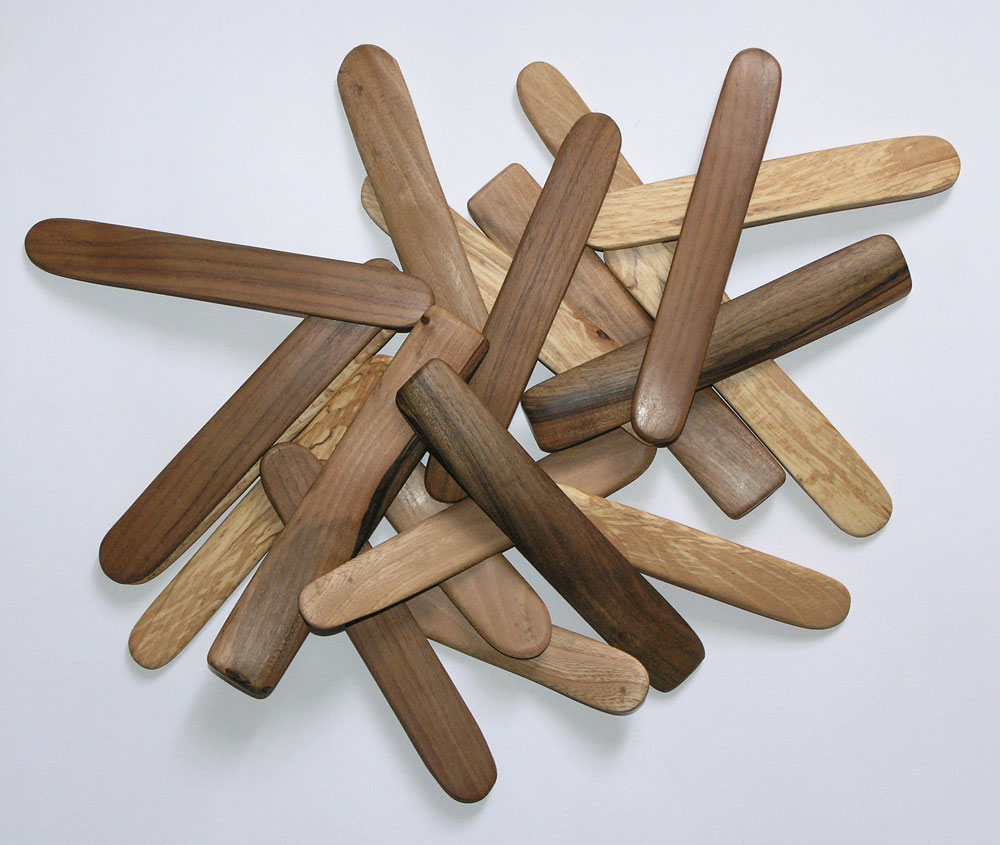 Since then I have made a dozen or so pairs, have bought some more and am learning how to play them too. ;-)
BTW: Different kinds of woods produce different tones, Bone Dry Music has a great page on rhythm bone tone explaining the relationship between the material’s specific gravity, density or hardness and its tone. That said I’m sure you can make decent rhythm bones with that old chunk of 2×4 leaning against the corner in the garage. Still, most of the wood I’ve used has been lying around here for at least ten years so it has had time to dry and it should be free of knots too.
 When I made a second pair out of what was left of my initial block, I did a better job of setting it up on my work bench so the resulting cut was a lot more precise – almost too thin in fact, which brings up the main difficulty in making bones in such a primitive way: the thicker you make that first cut the more work you have to sand them down but once it’s too thin…
These first two pairs went through a couple of changes during their first months of use: I thinned them down and rounded off their ends which made me write that “they sound sharper and they are louder then before”. Thickness is obviously and important variable in bone tone, as for the rounded ends I would like to think that that helps because it centers the impact (but this is only true if you are holding the bones so that the end of one hits the face of the other).
Since the bones seemed to slip sideways when they hit each other so I also flatten the bone’s surface as well as I could. With hindsight this was certainly because of my lack of technique, but I still find that wood bones with flat faces are easier to play because they are easier to hold and don’t slip as much. I would suggest them for beginners.
At one point I splurged and bought a pair of Aaron Plunkett’s Lignum Vitae Bones which is the world’s hardest and densest wood. These bone have an amazing feel to them, kind of a cross between wood and slate is the best way I can describe them. They have a tone that is both sharp and deep, so it’s no surprise that in comparison, the bones I made feel soft and if I dare say, kind of dull.
Still, one evening I was playing with Dave, an English blues guitarist/singer I sometimes play with, and purposely compared how my different bones sounded with his guitar. Back then I generally played with my nautical style bones, which I continue to use regularly (I have three pairs now) and entirely enjoy, they have a distinctive, relatively deep and sharp sound, and I find the real bone less slippery than my wood ones, they’re cool, and recommended! Along with some ragtime blues guitar picking they cut through nicely and distinctively. The Lignum Vitae bones however were kind of a disappointment, accompanying the guitar in this particular setting they sounded thin and a bit cold, I wasn’t happy with them at all (have to add here that at the time I somewhat lacked the necessary skills for such a dense wood but nevertheless as much as I like these on their own I still rarely find them right for playing along with an acoustic guitar; but that’s just me don’t take my work for it). On the other hand the oak bones fit right in. Discreet but warm and thick they sang along with the guitar and Dave spontaneously mentioned how nice they sounded. (These days I also play a lot with some sun bleached ox rib bones that I made)
One of the basics with rhythm bones is that the sound you get depends on where one bone hits the other. Because of the “primitive” way I made mine they don’t have an even thickness from one end to the other. 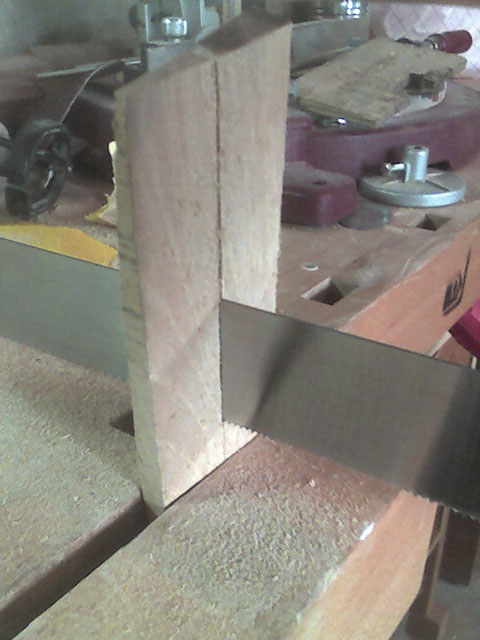 One even has an end that is half the thickness of the other, so holding the thin side up or down makes a big difference. What is the best thickness? Most wood bones seem to be around 1/4” to 3/8” thick, but some bone makers taper theirs so one side is much thicker than that. I’ve made some 3/16”, playable but too thin IMO. In any case, with time and practise you learn how you can modulate the tone you’re getting from the bones while you play them by both tightening or loosening your grip and changing where the bones hit each other. So while having the perfect bone is nice… the best is learning how to play them!
 Using A Branch
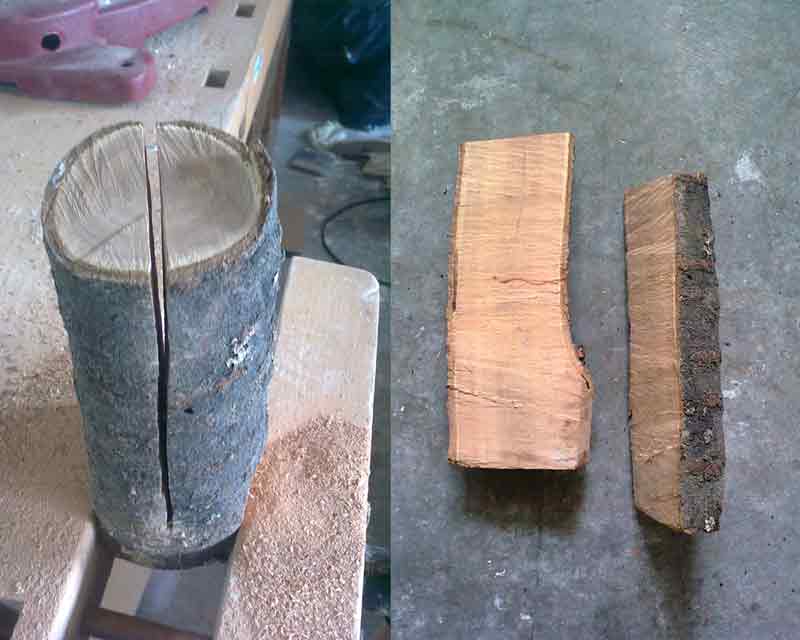
In February (‘10) I made a pair of bones from a just thick enough branch of Larch I had once picked up during a hike.
In most trees the heartwood, the older, nonliving central wood of a tree, is the best wood to use because it’s usually harder.  However using the heart or center core (and wood with knots too) is usually not recommended because the tensions in it may cause it to crack, right away or later on. So I cut the branch in half at the core and then sawed off the edges of each side to get two rectangular chunks to make the bones with.
Since the branch was thin, removing the core removed most of the heartwood but the sapwood had (and has) a nice feel to it so it seemed worth the effort anyway. I cut the curve with a small band saw and smoothed down a very ragged cut with a blade rasp; another useful DIY tool.
 Relatively quick but very dusty
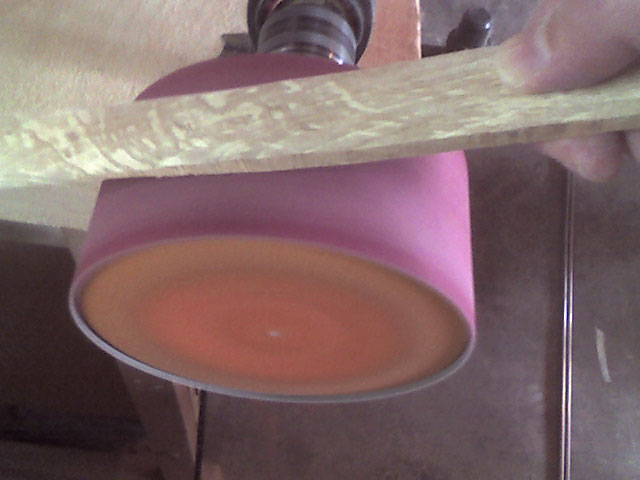
Once the rough shape of your bone is cut from whatever slab of wood you’re using it’s a relatively quick, albeit dusty, matter to sand them down to shape with a “Cushion Drum Sander” (picture). It removes wood faster than you think, so watch out, and is very useful for the inside curve. But it dose have a tendency of making a “bumpy” surface if you aren’t careful; and even so. 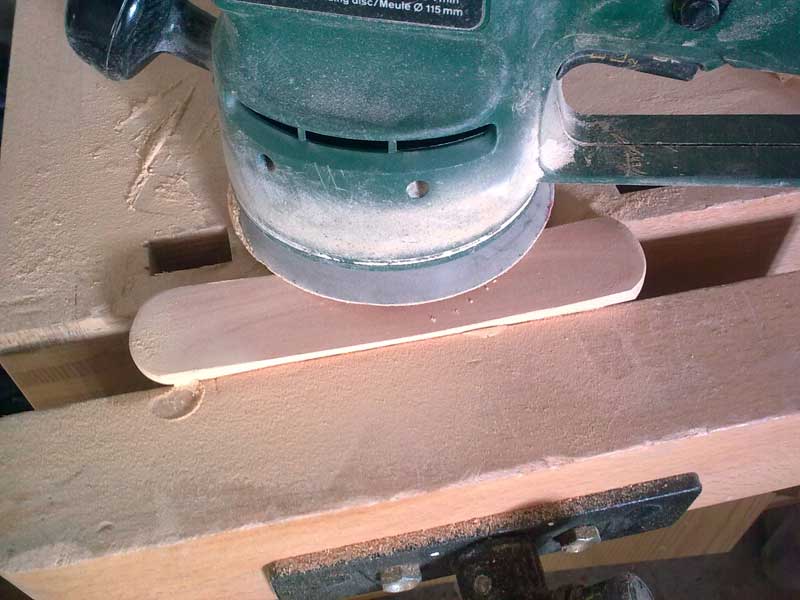 An eccentric sander is a good way to flatten any bumps that remain and if you have one, a belt sander is useful to smooth the outer curve.
I finished them off by hand with fine sandpaper and waxed them up with a homemade beeswax mixture.
A word about the curve.
When I made my first pair of bones, it never occurred to me that they could be flat. However in time browsing the web showed me otherwise. Obviously not putting a curve in your bones will save a lot of time.. But I haven’t tried a pair like that yet (probably should) so I can’t comment on them. Personally I like the curve, it both reflects on the “rib bone heritage” and offers the possibility of a face to face contact instead of the end to face you would have with two flat pieces of wood. Last but not least, I feel it adds beauty to the object.
What Cross Section? 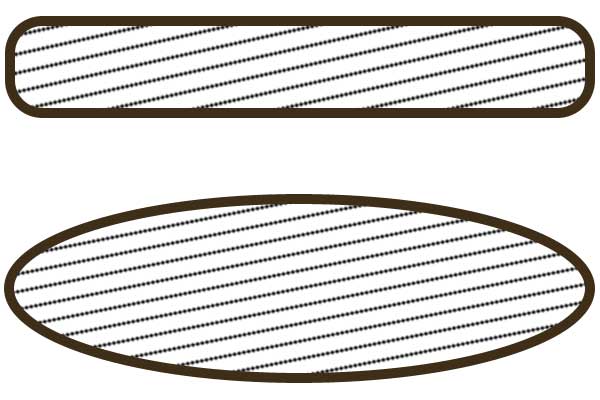
As I wrote above I purposely flattened the faces of the bones I first made, getting a rectangular cross section, but being curious as well as feeling my playing skill were up to it I also made some oval shaped face bones.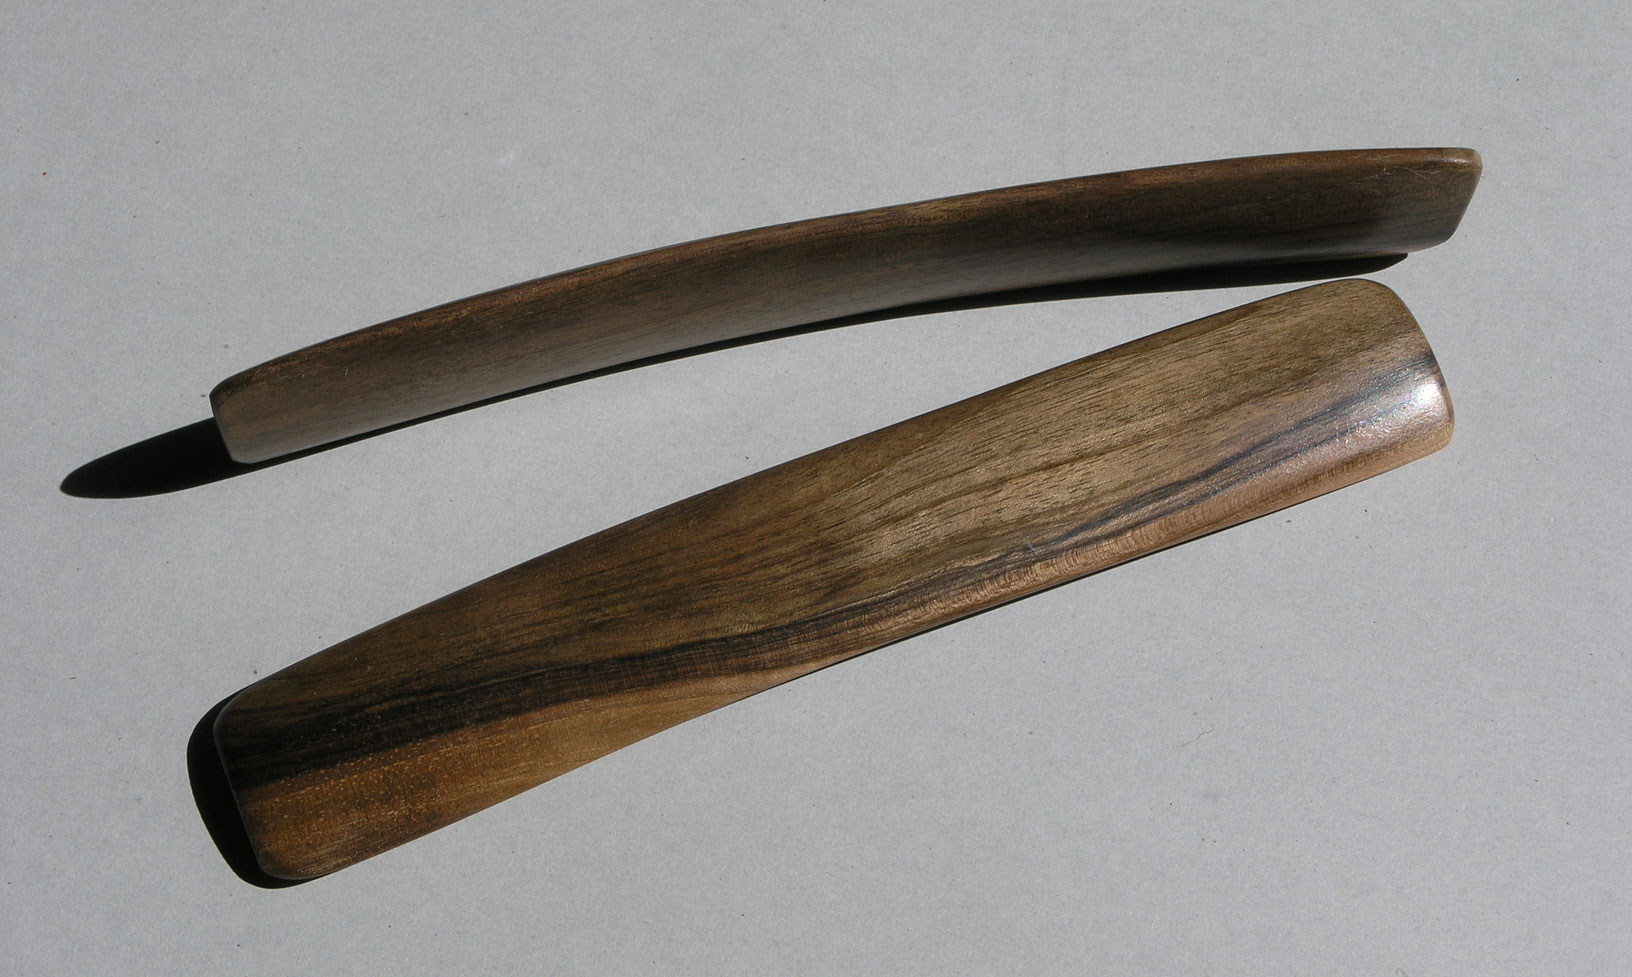 I cut two 1/2 inch thick curves for these, but that was too thick for my hands and to chunky to be comfortable, so I thinned them down to 3/8th of an inch and must say how pleased I am with them. They’re 7 and 1/2 inches long and 1 and 2/8 inches wide. Their counterpart, not pictured, are just a bit thinner both in width and thickness.
Conclusion:
- A big band saw can be usful if you have access to one.
- The more precise your cut is, the less wood you have to sand.
- Too thin is too thin.
- Super rough sand paper is rarely the best choice, usually medium and fine are all you really need.
- Heavier, dense wood is preferable? Not necessarily, is probably the best answer to that, depends on what you like and the type of sound you want for a giving situation
- I tend to find the flatter “rectangular cross section” wood bones easier to play because they don’t slip as much but the oval cross section bones sound denser, (thicker wood in the middle). It’s nice to have both.
- Bone Dry Music has a whole selection of inexpensive, unfinished wood rhythm bones from various makers if you don’t feel like sawing anything.
- I’m not affiliated with them and don’t make money sending you there, I just think it’s a great shop to browse and learn about rhythm bones in.
- That said if you want to make rhythm bones from ox or cow ribs, I recommend Scott’s Make your own musical rib bones booklet. I followed his instructions and am more than pleased with my own sun bleached ox rib bones!
- Also, speaking of shops, my own Rattlebrained Rags shop over at Zazzle has a growing number of unique musical instrument themed designs to check out!
- This page brings together a series of short blog post that I made while beginning to learn how to play bones and making them. I’m sure there’s a lot here that can be improved on. So…
- Comments are more than welcome!
And BTW, if ever you’re inspired to try making your own: don’t remove the safety features from your tools, wear thick work clothes, gloves when needed, eye protection and a face mask for dust, even for wood…
More rhythm bone links:
Rhythm Bones Central; curious about Rhythm Bones? This is the place to start!
Bone Dry Music @ YouTube; Hear the sound of rhythm bones made of different materials! There is a lot to learn about playing rhythm bones just by watching this series too.
More rhythm bone videos on Youtube.
The rhythm bone group on yahoo

29 August 2010, 06:29
Hi
21 July 2011, 19:55
Thanks..I have always been stood and wondered how those people playing the bones get such a “tap shoe” like sound from them…
now I know
off to make some for myself :)
4 May 2012, 16:40
Nice blog! Are you using Wordpress as your main platform? I ask this because your blog looks a little different. dd1
5 May 2012, 10:50
Hi Christian, Thanks! The blog is made with Textpattern which I like and think worth checking out, although the initial learning curve is probably a bit steeper that WP.
5 August 2015, 06:59
Nice article. I have made several sets of wood bones in the past and am making 2 real sets of beef rib bones right now.
Rather than all that cutting and shaping you are doing try steam bending the wood. That is how I made mine.
Just make a jig to set the bones in once you steam the wood. Works like a champ!
5 August 2015, 10:54
Hi Csfield, Thanks for the comment. Sounds like a good idea!
How thick can you make them and what type of wood are you using?
29 May 2018, 12:02
Hi, thanks for writing this blog – it’s been really interesting. I want to try hand carving some myself, so found this useful. :)
29 May 2018, 12:33
What do you use to finish/seal them and to protect them?
29 May 2018, 16:40
Hi Tara, thanks for your message, it’s always nice to know that these blog posts are of interest to someone “out there”. :-)
I can only encourage you to carve some yourself. Even if the first pair I made were far from perfect, they remain one of the two pairs I usually have in my bag; the other being the pair of nautical style bones. They are great when I don’t want to be too loud and I admit a bit of a soft spot because of having made them myself.
I protect them with a homemade mixture of beeswax and turpentine (or white spirit) that I made long enough ago that I’m not sure what the proportions were (Possibly about 15% turpentine / 85% beeswax). You break or grate up the beeswax into small pieces and get it to melt in a double boiler (beware that it can catch on fire so don’t over heat or do this over or near a flame!).
Once melted you remove it from the heat and in a well ventilated space an add the turpentine (double warning for the turpentine which is extremely flammable!!).
Once it has cooled down somewhat but before it begins to solidify, you put the mixture in a can or jar that can be closed with a lid. I have some in an old peanut butter jar..
The purpose of the turpentine is to soften up the beeswax enough that it can be used as a polish for the wood, so once it’s cooled down you can use a rag to apply it onto the wood and polish it up.
If you search the web for “beeswax and turpentine wood polish” you will find quite a few variations. Some use olive oil (old “past the usable date” cooking oil can be used) instead of turpentine, some replace about 1/5th of the beeswax with carnuba wax which is a harder wax. So you can see there is a certain amount of flexibility in the proportions…
Hope that helps!