
I wasn’t entirely satisfied with how my first electric washboard turned out and have been wanting to experiment further and so this last week I finally got around to making another.
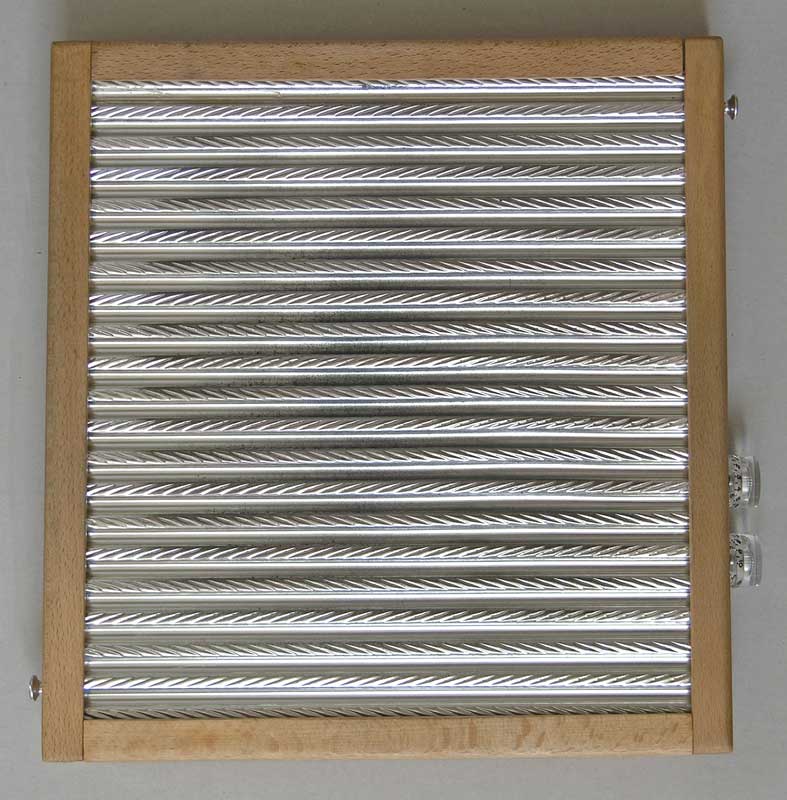
Since the frame of a Columbus washboard isn’t really thick enough to add much, I began by making a new frame out of beech wood taken from the legs of an old saw horse. The idea being that a harder wood will hopefully give a bit more focus to the vibration than the softer pine most washboards are made of. How will I know if that’s true? Obviously I wont unless I make an identical one with pine…
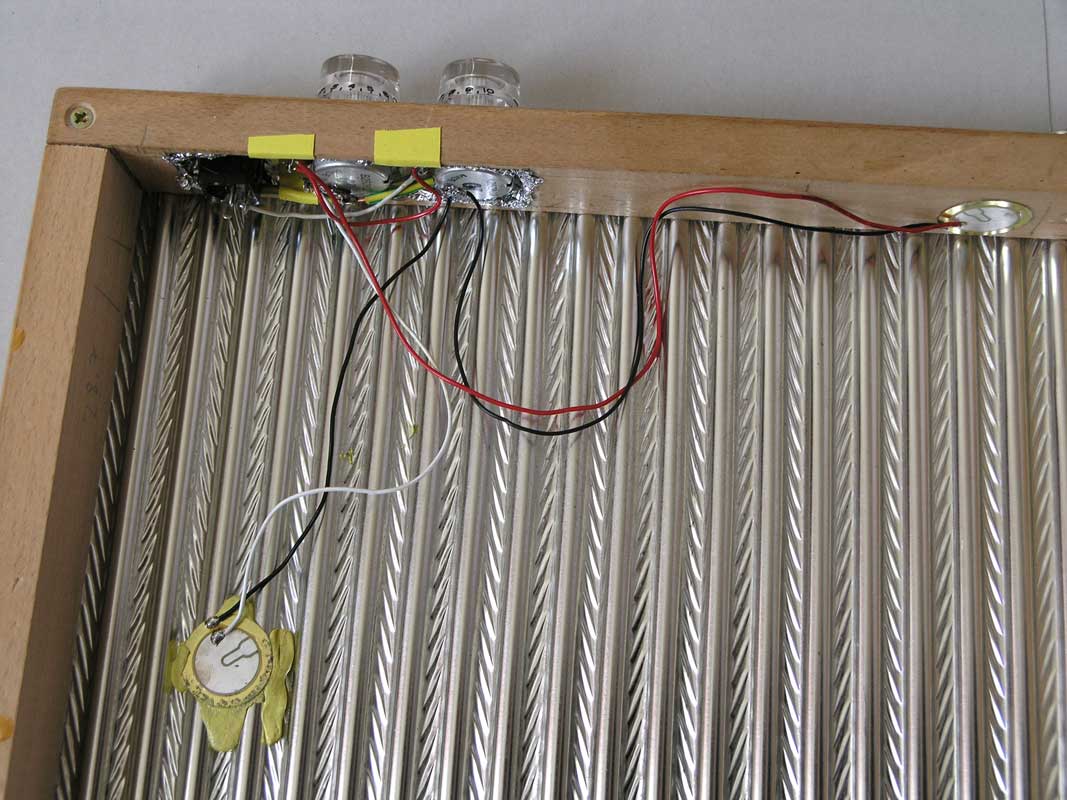
First I had one piezo mic attached to a logarithmic 250kohm volume pot and a linear 250kohm tone pot connected with a 0.05mf capacitor. I tried putting the piezo mic in different places but basically the two main sounds are either on the metal or on the wood. Neither was totally satisfying and since the tone control wasn’t very useful – it removed the trebles and most of the volume too yet when turned up it the washboard sounded similar to what it sounded like without the tone pot (?), I decided it wasn’t worth having. That said, the pots are brand new but the capacitor was at least 20 years old, so maybe that was part of the problem, I really don’t know…
Anyway, I added a second piezo mic and used the tone pot to connect both mics so that I can have one or the other or a mix of both depending on the pot’s position. Since one is attached to the wood frame and the other the metal surface the sound goes from chunky thuds to metallic clashes and what’s inbetween which is where my heart lies for the moment.

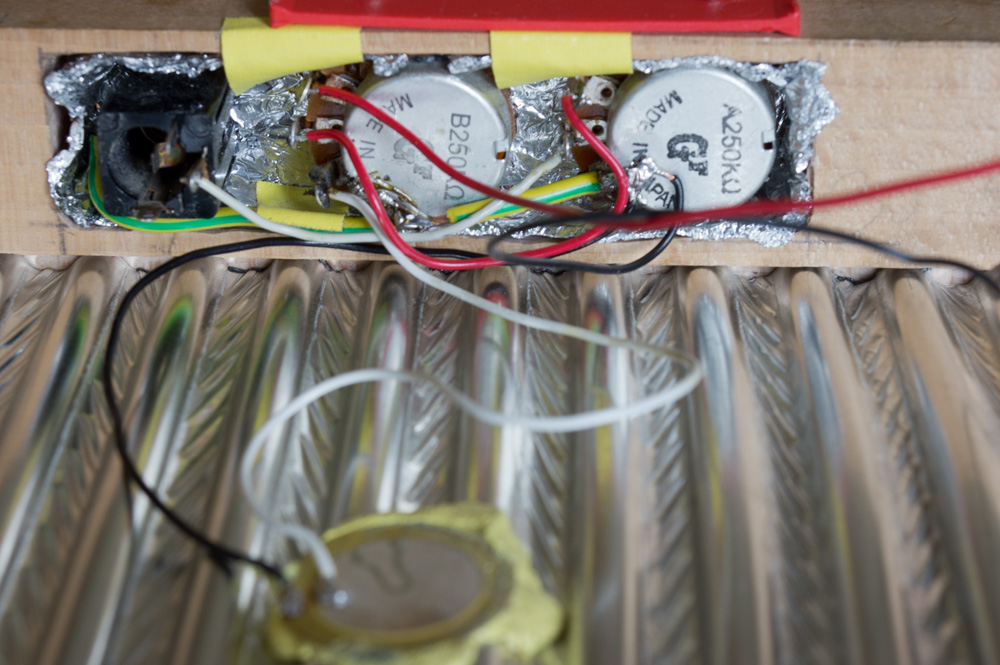
The biggest problem so far was the fact that the new pots are really easy to turn, in fact just brushing them with my forearm would change the settings. Not good. So this afternoon I bent a piece of plastic I had to prevent that from happening. Time will tell if it’s too much of an annoyance or not. If so I’ll have to move the pots to the top of the board which is perhaps where I should have put them initially.
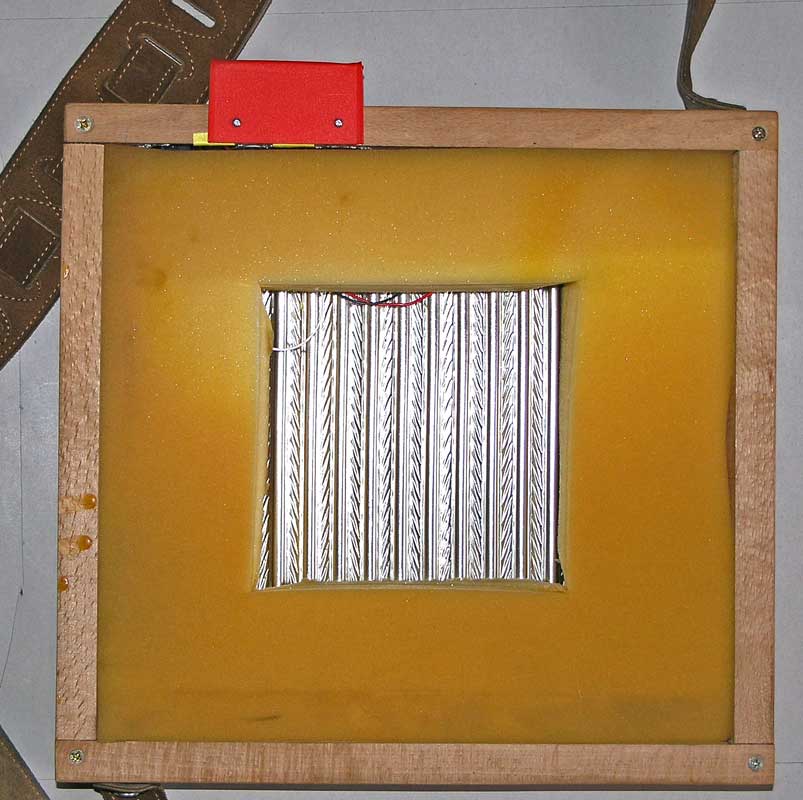
Another thing I’ve done is stick a piece of foam into the back of it. The piezos really amplify the metal’s resonance a lot, too much for my taste. Filling the back with foam cut it down too much so I’ve cut a chunk out of the center and will be trying it like that for a while.
So far I must say that I prefer the sound of an non amplified washboard. However when playing with brushes for instance, its hard to hear them above the rest of the electric blues band Swamp Train I’m playing with, not to mention the noise I’m also making on my small drum set. Plus, it would be a nuisance to have yet another microphone right in front of the washboard for that. Ideally it would be cool to be able to amplify the washboard for certain songs as well as be able to throw in an occasional pulsating distortion filled solo to spice up the evening…
Updated April 27 2011 to add: BTW, I just used some bits of old wire I had but none were long enough to just have two colors. So: the Black & Green/Yellow wires are ground and the Red & White are live. I could draw a diagram if anyone is interested (just leave a message). /end update
Updated yet again to add: Over the next years I made some modifications which were resumed here
3 August 2012, 18:39
Hey there. Awesome write up. I’ve never used an actual pick up for mine. Have you ever heard of a “Woody”? Its basically a pick up made to slide into the sound hole of an acoustic guitar…or to be held onto the side with putty. I’ve devised a way to stick that guy on the back of my washboard. It has a 1/4” jack on a 12ft cord that I plug dirctly into my pedal set up. Very easy…very simple. You dont have the options for pick up control or volume…but the volume is easily adjusted on the amp. I use a zoom pedal with expression, tube screamer, delay, and chorus…with no feedback what so ever. If you’d like some more info or pictures give me a shout and I’d be glad to help. Of course now they have the “Woogie Board” but I cant bring myself to spend the 250-300 they want for one. Haha! Thanks again! Charlie (Kutfromtheknow@aim.com)
3 August 2012, 20:21
Hi Charlie,
Interesting idea! Sure I would be glad to get a picture or two and a few more details.
I’ll post them here if you want.
15 February 2013, 22:46
I’m curious when connecting the piezo to the washboard, what did you use to make it flat/flush and still pick up the vibrations? I’m working on my own and have hit a roadblock with this. Any suggestions you have are more than welcome-thanks.
15 February 2013, 22:56
Hi Becky,
I used double sided tape for the piezo against the wood and UHU Tac or Putafix a “blu-tack” type putty for the one against the metal.
Hope that helps.
5 July 2013, 18:39
I’m interested in seeing a diagram. I have an electric washboard I built myself, but I’m in the process of adding tone and a capacitor. My biggest conercern is where to put the ground: since all I did before was slap on a Fishman acoustic guitar pickup.
5 July 2013, 19:36
Hi Nathan,
It’s been a while, never thought anyone would ask. ;-)
I’ll see what I can do but I’ll need a few days to find time to make it…
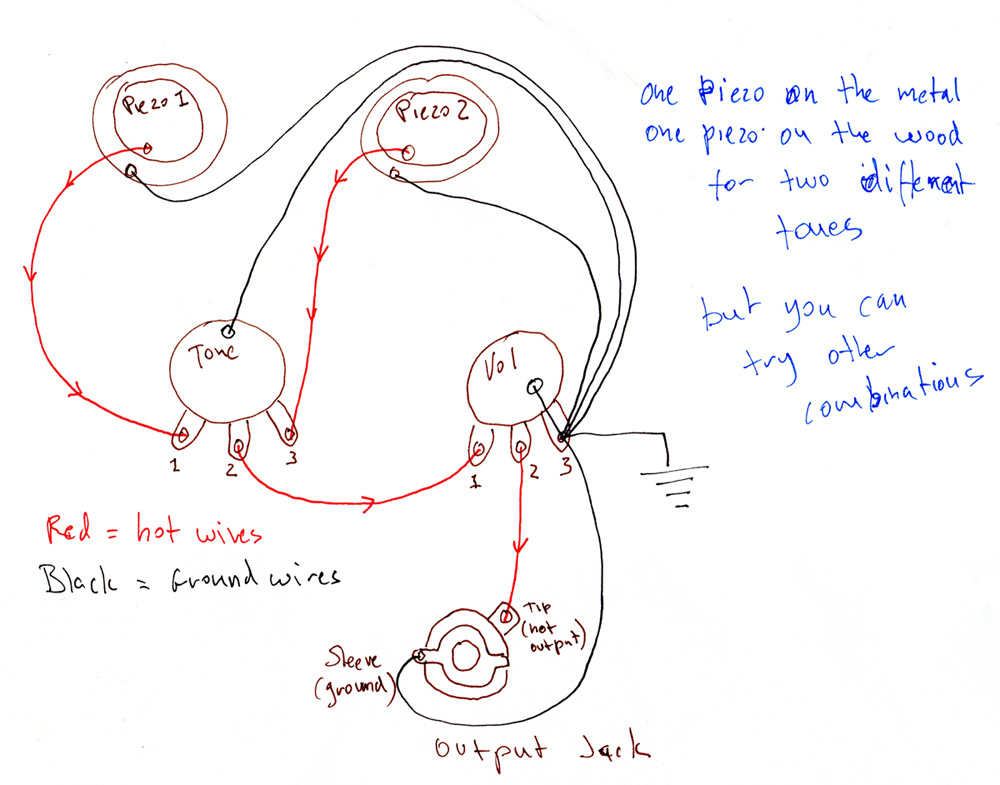
If I remember properly (my board is crosstown where I practice at the moment), the black ground wires connect to the volume pot ground (like for an electric guitar) and I’ve used the green/yellow wire to connect that to the jack. However it is also soldered to the casing (but not to a terminal) of the tone pot to prevent any unnecessary noise.
The tone pot receives the two piezos output wires, one on terminal 1 and the other on 3 and sends the hot output from terminal 2 (the center one) to the volume pot’s terminal 1.
The volume pot’s terminal 2 sends the hot signal to the jack. The volume pot’s terminal 3 is connects the ground wires and the pot’s casing to the jack’s ground.
Hope that makes sense. :p
10 July 2013, 10:26